How to build a basic staircase for a sloped yard
Do you have a slope in your yard that is difficult to climb and slippery when wet? If so, a basic outdoor staircase could be a great project to help improve accessibility in your yard. We have outlined a basic landscaping staircase project with step by step instructions to have you on your way.
Planning
First things first, you will need to measure the area’s length and height to approximate the number of steps you require and each stair tread’s depth.
Measuring and cutting the timber
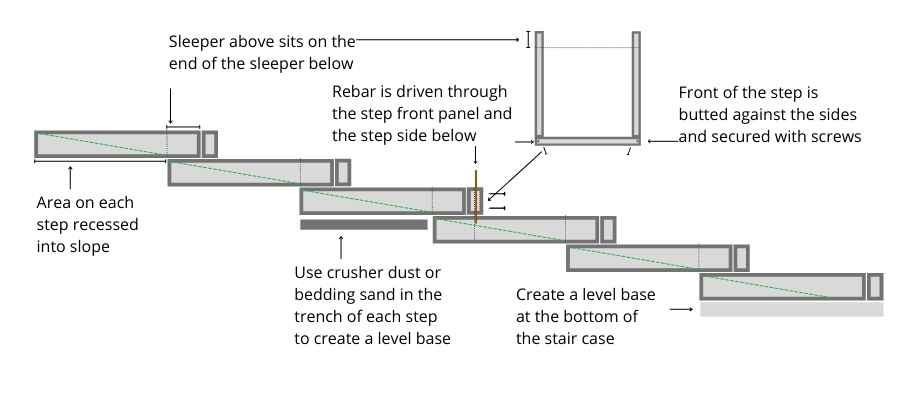
When measuring the timber for each step’s depth before cutting allow for 3x the width of the sleeper extra on each side as each step side will be recessed into the slope and the other end will sit on the sleeper below it.
Material used
For the sides of the steps, we will use two sleepers recessed into the ground to stabilise the steps’ side and create a stable level foundation for the steps above.
Preparation
Mark out the area where your steps will be placed with landscaping chalk paint. Cut sleepers to size. If the bottom of your staircase isn’t a level surface, you will need to create one, this can be done by building up the soil in the area or building an additional sleeper foundation under the final step.
Step one
Use a trenching shovel to dig a small trench into the slope. The sleeper should fit into the trench with 2 sleeper widths lengths protruding out the end which will sit on the step below it. Repeat for the opposite side
Step two
Ensure the trench is just below flush with the ground or sleeper in front and use crusher dust and a spirit level to create a level bed that is flush with the ground or sleeper in front. Tip: Use the sleeper as a tamper to hit the crusher down and help create a compact level surface. Repeat for the opposite side
Step Three
Place the sleeper pieces for the step sides into place in the trench and sitting on the sleeper in front. Butt the sleeper piece for the front up against the sides. Secure with two screws into each side coming in from angle off the side to allow space for the rebar pin in step four.
Step four
Use a hammer drill with a wood auger bit to drill from the top through the edge of the front sleeper into the ground or the sleeper side it is sitting on.
Step four
Place rebar length into the predrilled hole and use a sledgehammer to drive the rebar through the sleeper into the ground or sleeper below. This is used as a pin to secure the steps together and stop the movement.
Step five
Repeat step one to four for each step required.
Step six
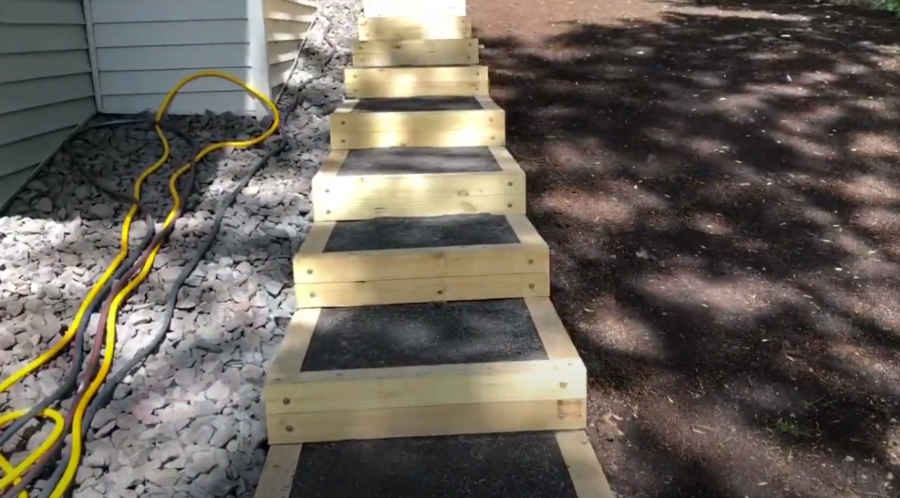
Backfill steps with a product like bedding sand gravel and top off with crusher dust. Using products that provide great drainage and minimising moisture sitting against the timber slippers will prolong your staircase’s life by helping to prevent wood rot.
Looking for the products to build your garden steps? contact Wellers Hill Hardware & Landscape Supplies based in the Brisbane Southside on (07) 3848 1682.
Disclaimer: Follow at your own risk. This is simply a guide and will not be suitable for every situation.
